
Introduction
Skylights can transform a home. Done right, they brighten dark rooms, reduce daytime reliance on electric lighting, and add a sense of space that standard windows can’t match. Done poorly, they introduce glare, heat loss, leaks, and headaches. The difference often comes down to placement—where and how you position a skylight on the roof and within the room below. If you’re in Canada, placement matters even more because of higher latitudes, harsher winters, and big seasonal shifts in daylight.
This guide walks you through the essentials: how placement influences light quality, comfort, energy performance, and resale value, plus practical tips to get it right.
Why Placement Matters More Than You Think
A skylight isn’t just a hole in the roof; it’s a daylighting system. Its performance depends on four variables:
- Orientation: The cardinal direction the skylight faces on your roof.
- Roof pitch and geometry: How steep the roof is and whether there are obstructions.
- Shaft design: The light well that connects roof to ceiling.
- Room use and finishes: What the space is used for and how reflective the surfaces are.
Dial these in, and you control not only how much light enters a room, but also its quality—soft vs. harsh, steady vs. patchy—and the thermal impact on your home.
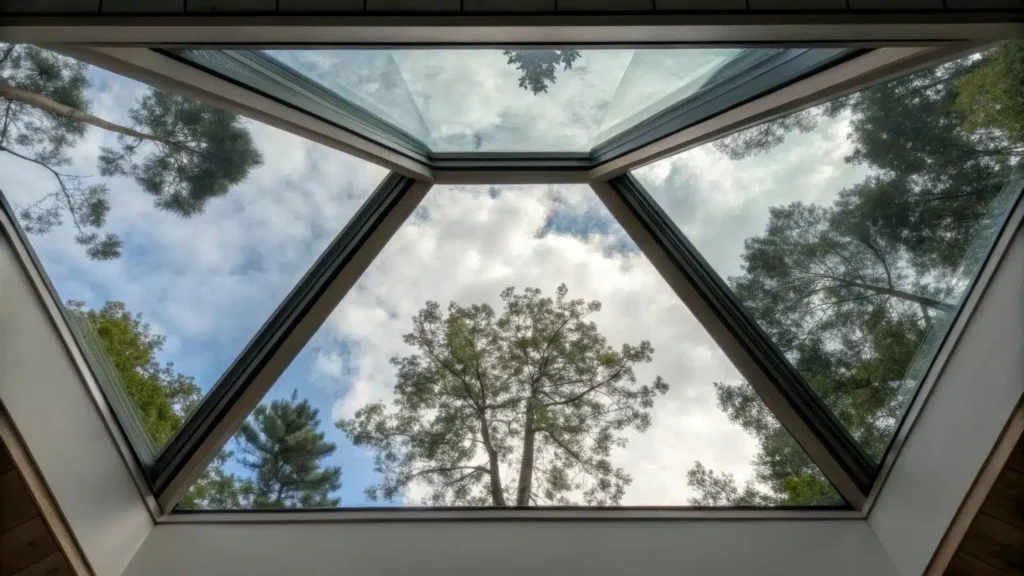
Orientation: How Direction Shapes Light
Canada’s latitude means a lower winter sun and a high, intense summer sun. Orientation shifts both brightness and heat:
- North-facing: Delivers soft, consistent light all day with minimal glare. Ideal for studios, home offices, and kitchens where colour accuracy matters. It’s the most “museum-like” lighting.
- East-facing: Bright morning light that fades by midday. Great for breakfast nooks and bedrooms if you like waking with the sun. Low afternoon heat gain.
- South-facing: Maximum daylight and solar gain—wonderful in winter, potentially hot in summer. Pair with Low-E glazing, internal blinds, or exterior shading in warmer regions or sunny elevations.
- West-facing: Strong afternoon light with higher summer heat. Avoid over desks or TVs; consider for hallways or bathrooms with good ventilation.
Tip for Canadian climates: If you want winter warmth without summer overheating, a north or high-pitched south placement with performance glazing and operable shades offers the best balance.
Roof Pitch, Placement Height, and Obstructions
- Steeper pitches present a skylight closer to perpendicular to the sun in winter, improving solar access when you need it most. Shallow pitches can reduce winter input and increase the risk of snow accumulation around the curb—plan for proper flashing and ice/water protection.
- Locate the unit as high on the roof plane as practical to minimize shading from dormers, chimneys, or neighboring structures.
- Avoid valleys and low points where snow and ice linger. In colder regions, add ice-and-water shield membranes and consider curb-mounted models for better sealing.
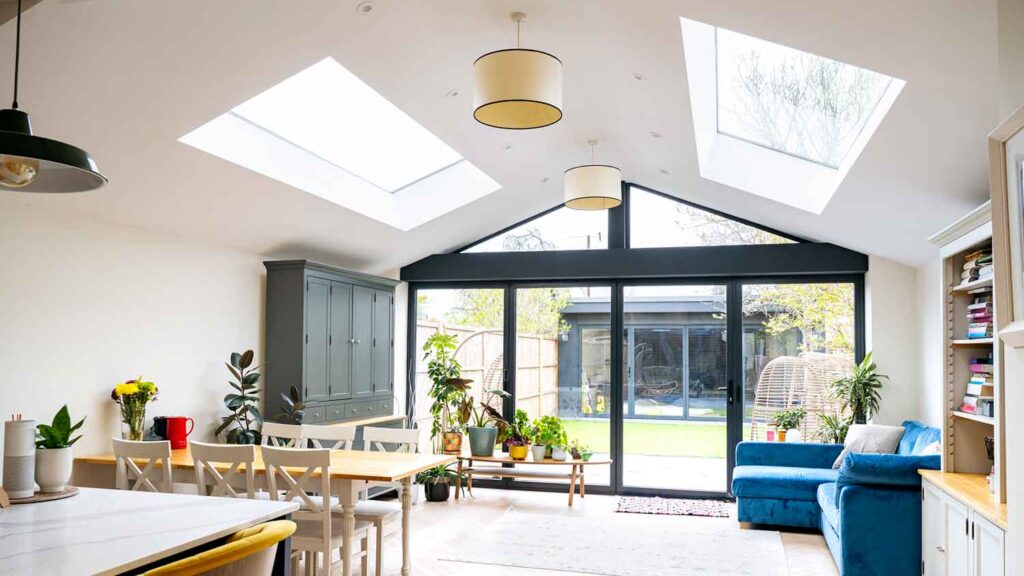
Size and Spacing: Right-Sizing for Balanced Daylight
Bigger isn’t always better. You want even illumination, not hot spots.
- As a loose rule of thumb, target skylight area at roughly 3–10% of the room’s floor area, adjusting down if the room already has generous windows and up if it’s interior or windowless.
- Two smaller skylights often provide more uniform light than one large opening—and reduce glare.
- For narrow spaces (hallways, closets, bathrooms), tubular skylights deliver surprisingly bright, diffuse light with minimal roof footprint and excellent energy performance.
The Light Well: Your Hidden Brightness Booster
The skylight glass only starts the job. The light well — the shaft that channels daylight from roof to ceiling — determines how that light spreads, how comfortable it feels, and how much actually reaches usable surfaces.
1. Flared wells for even, soft light
A flared well widens as it approaches the ceiling, turning a concentrated beam into a broader wash. This reduces hot spots and harsh glare directly under the skylight and distributes daylight across a larger area. In practice, a flared transition of even 10–20 degrees at the top makes a noticeable difference: the ceiling and upper walls act like secondary reflectors, scattering light gently into the room.
2. High-reflectance finishes multiply daylight
Treat the interior of the shaft as a mirror for daylight. Matte white paint with very high reflectance (seek products rated above 85–90% for interior light shafts) gives a soft, diffuse bounce. Commercial reflective liners (multi-layer reflective films or anodized aluminum panels) offer even higher performance and are especially valuable in long or narrow shafts where loss is greatest. Avoid glossy finishes that create specular glare; the goal is diffuse reflection, not harsh mirror images.
3. Keep shafts short, straight, and unobstructed
Every foot of length, bend, or kink in a shaft cuts useful light. Each bend creates additional surface area that absorbs or scatters light away from the target zone. Minimize turns, avoid routing shafts around ducts or joists, and, where possible, drop the skylight closer to the ceiling plane so the shaft is shorter. If the shaft must run a distance, compensate with higher-reflectance liners and a larger flared mouth at the ceiling.
Practical details that matter
- Use a smooth, seamless liner or tape seams tightly; gaps and textured surfaces trap light.
- Provide insulation and air sealing around the shaft to prevent thermal bridging and condensation, but keep the reflective surface intact and dry.
- Install an accessible diffuser or trim at the ceiling that helps scatter light and hides the shaft from view; a good diffuser can correct minor hot spots.
- For long shafts, consider a series of stepped flares rather than one abrupt transition to preserve even distribution.
- Make sure the shaft is serviceable—you may need to clean dust off reflective liners over time to maintain performance.
In short: think of the light well as daylight’s distribution network. A well-designed, short, flared shaft with high-reflectance interior surfaces will multiply the benefit of the skylight glass, delivering comfortable, evenly spread daylight that uplifts the room rather than blasting a single spot.
Glare, Diffusion, and Visual Comfort
Skylights deliver top light, which can be intense near noon in summer:
- Choose diffusing glazing or add internal shades in spaces where direct sun would be uncomfortable (over stair landings, seating, or beds).
- In task areas (kitchen prep zones, home offices), aim for indirect top light—offset the skylight from the task surface and use a flared, matte well to soften contrast.
- Consider operable skylights with blinds for maximum control across seasons.
Venting and Moisture: Placement for Healthier Air
In kitchens, bathrooms, and laundry rooms, a venting skylight at the highest point of the ceiling acts like a chimney, exhausting humid air and odors:
1. Venting Skylights as Natural Exhaust Systems
In kitchens, bathrooms, and laundry rooms, air quality is just as important as light. A venting skylight, installed at the highest point of the ceiling, functions like a natural chimney. Warm, moist, or odor-laden air rises, and the skylight provides an exit point—improving comfort and reducing the burden on mechanical ventilation systems.
2. Strategic placement for maximum effect
Placing venting skylights in the right locations makes all the difference. In bathrooms, they work best above showers or bathtubs, where steam quickly accumulates. However, clearance from water spray and proper finishes are important to protect the unit. In kitchens, skylights are most effective when positioned near cooktops or ovens to draw out cooking odors and lingering heat—though not directly overhead, since grease particles and smoke can soil the glazing. In laundry rooms, a skylight near dryers or folding stations helps carry away warm, moist air that otherwise builds up in confined spaces. Even at the top of stairwells, a venting unit encourages stack ventilation, drawing cooler air from lower windows and pushing hot air up and out.
3. Energy and comfort benefits in different climates
In warm climates, venting skylights act as passive cooling systems, reducing reliance on air conditioning. By purging trapped heat from kitchens and upper floors, they create a refreshing cross-breeze when paired with open windows. In cold climates, they still serve a purpose—but insulation and air sealing around the shaft become critical. Without proper sealing, the shaft can become a weak point for heat loss, or worse, a source of condensation where warm indoor air meets cold surfaces. Well-insulated shafts, along with double- or triple-glazed skylights, ensure homeowners can enjoy the ventilation benefits without sacrificing energy efficiency.
Energy Performance: Comfort Without Penalty
Skylight placement and specs influence heating and cooling:
- In cold regions, prioritize low U-factor (reduces heat loss), warm-edge spacers, and argoned-filled, Low-E double or triple glazing. North or filtered south exposures reduce overheating risk.
- In milder or sunnier regions, focus on lower Solar Heat Gain Coefficient (SHGC) and integrated shading for south/west exposures.
- Keep frames and curbs thermally broken where possible, and insulate the light well to the same standard as surrounding attic spaces.
Aesthetics and Daylight Quality: The “Wow” Factor
Placement defines the mood of a room:
- Over a staircase, a linear run of small skylights turns a circulation space into an architectural moment.
- In a kitchen, a pair of north-facing units over the aisle gives shadow-free prep light and makes colours pop.
- In living rooms, locate skylights to wash walls or highlight textures (brick, wood slats) rather than blasting seating zones.
Thoughtful placement shapes perceived ceiling height, material richness, and the daily rhythm of a space—qualities buyers notice even if they can’t name them.
How Placement Influences Home Value
While exact returns vary by market, skylights can support value in three practical ways:
- Curb appeal inside: Natural light photographs beautifully and makes rooms feel larger, which helps listings stand out.
- Quality-of-life features: Bright kitchens, airy stairwells, and ventilated bathrooms signal a well-designed home.
- Energy and comfort story: When paired with efficiency glazing and proper installation, skylights back a narrative of lower daytime lighting needs and smarter passive design.
On the flip side, poor placement (glare over a TV wall), obvious condensation, or aging acrylic domes can hurt buyer confidence. Prospective buyers in Canada also look for evidence of professional flashing, snow/ice detailing, and recent glazing. Placement that demonstrates forethought—and documentation showing quality installation—reduces perceived risk and enhances value.
Room-by-Room Placement Tips
Kitchen
- Orientation: North or high east for colour-true, cool light.
- Avoid placing directly over cooktops; offset to illuminate aisles and counters.
- Consider vented units to exhaust heat and moisture.
Bathroom
- Use tubular skylights or small diffused units for privacy and soft light.
- Venting models help control humidity; ensure meticulous sealing/insulation.
Bedroom
- Prefer east for gentle morning light; add blackout blinds for sleep.
- Avoid west-facing units over the bed to limit late-day heat and glare.
Living/Dining
- Combine north for consistency with modest south for winter warmth.
- Use multiple smaller skylights to balance light and avoid perimeter glare.
Hallways/Stairs
- Tubular skylights or a row of small units creates continuous, safe illumination.
- High placement minimizes direct view of bright sky and reduces glare.
Installation and Replacement Considerations for Canadian Homes
- Snow load & ice dams: Choose models rated for local conditions. Add ice-and-water shield, proper curb height, and consider snow guards where needed.
- Flashing kits: Use manufacturer-specific flashing matched to your roof material (asphalt, metal, cedar). Placement should avoid valleys and complex intersections.
- Roofing cycle: Best time to install or replace is during roof replacement—you’ll get cleaner integration and longer warranty alignment.
- Permits & code: Check municipal requirements, especially for structural changes or when adding multiple units.
Common Placement Mistakes to Avoid
- Centering a skylight directly above a screen or desk, creating glare.
- Oversizing a single skylight instead of using two smaller ones for even light.
- Placing on west-facing low-slope roofs without shading or low-SHGC glazing.
- Ignoring shaft insulation and air sealing—leading to condensation issues.
- Installing in snow-collecting areas (below dormers/valleys) without enhanced waterproofing.
Conclusion
Skylight placement is the difference between “nice idea” and transformative daylight. Orientation controls light quality and heat; roof pitch and the light well shape distribution and comfort; and room function dictates how you’ll experience the result day to day. In Canadian homes—where winters are long and summers can be intense—smart placement paired with performance glazing, careful flashing, and a well-designed shaft delivers bright, comfortable spaces that photograph beautifully and live even better. Make placement a deliberate design decision, not an afterthought, and your skylights will reward you with balanced light today and stronger buyer appeal tomorrow.